Learning scale matching using fSpy
Next, let’s learn scale matching. To put things in perspective, let’s say you have a real reference that you want to replicate as a 3D scene. You can load it as a camera background, and start modeling it, but soon enough, you will encounter a big challenge, which is to match the same position, rotation, and focal length of the camera that took the shot.
You can see in this example the difficulties in matching the same log cabin reference:
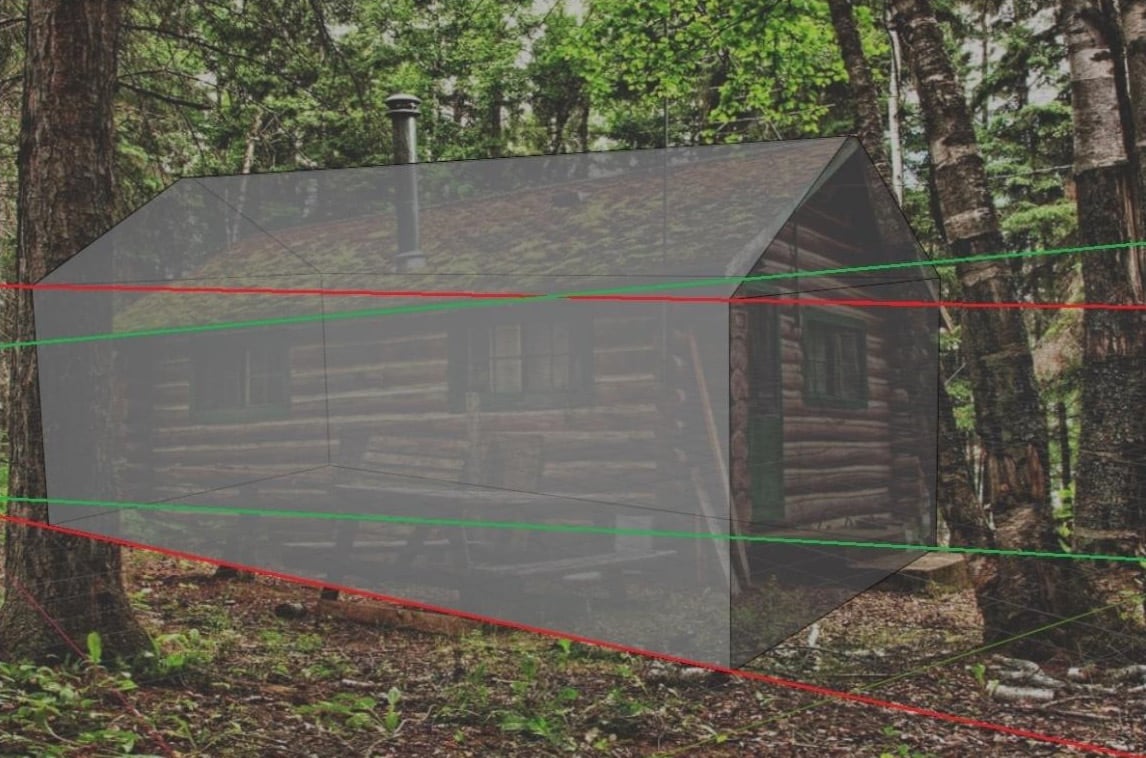
Figure 1.4 – Wood cabin model not matching the reference
Our objective is to place the modeled cube exactly on top of the cabin reference (the red lines must be on top of the green lines). The corners must match each other in order to have true camera matching; doing it by eye won’t cut it, so we need to do it the right way.
Luckily, we have fSpy, which is a free open source software program that allows us to estimate the camera parameters from an image reference and import it into Blender.
The way it works is as follows: you import the reference image whose camera settings you want to match, and you choose the number of vanishing points; you will find this feature on the top left side panel of the fSpy program.
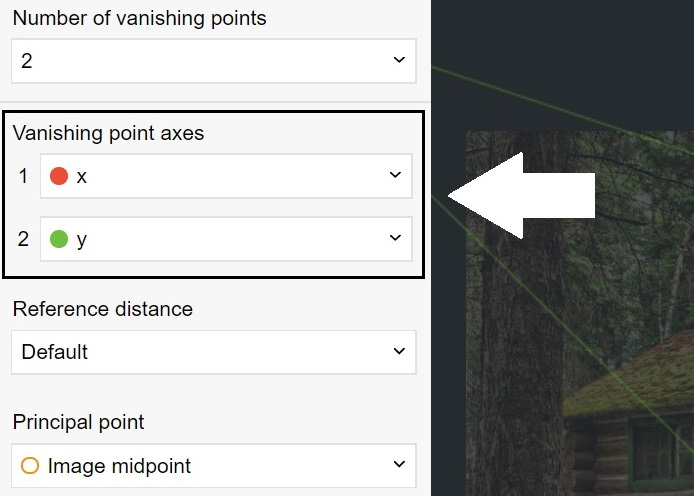
Figure 1.5 – Vanishing point axes in the fSpy interface
Basically, the number vanishing points depends on the type of reference you’re using:
- One vanishing point: This means that your reference has a point where all lines meet. If you follow any parallel lines in the reference, they will end up meeting at one point.
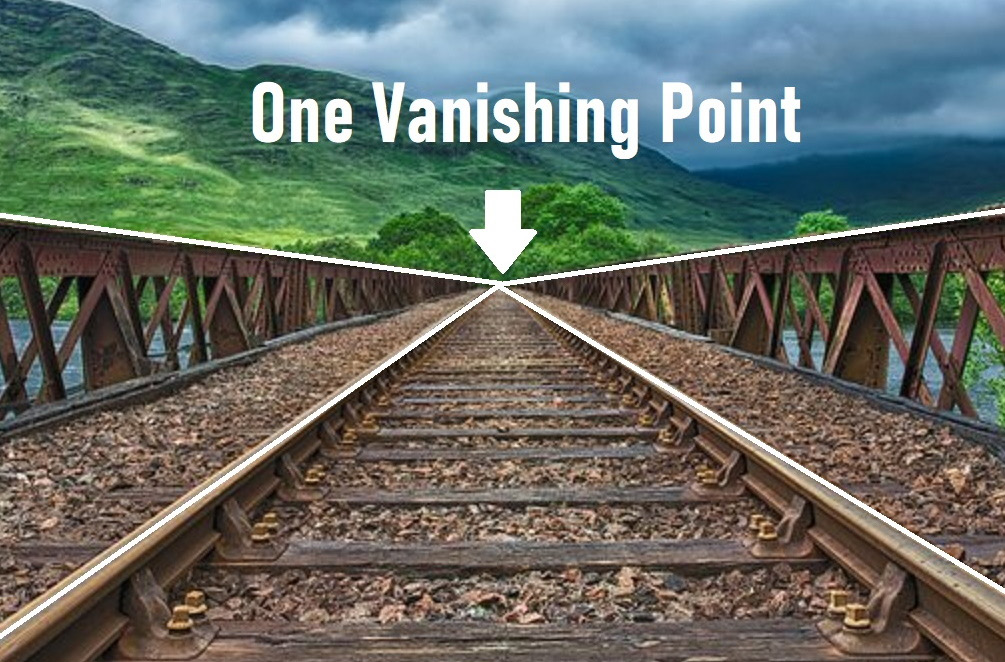
Figure 1.6 – Example of one vanishing point reference
- Two vanishing points: You can use two vanishing points in case there are two kinds of parallel lines in your reference, with each side seemingly slowly fading away into distance; they will meet at a certain point in the distance. An example would be something like this:

Figure 1.7 – Example of two vanishing points
The camera parameters are as follows: focal length, rotation, and position of the camera.
In our case, we will be using a wood cabin reference that has two vanishing points; you can tell this by following the wood lines on both the front and side faces of the cabin. You can download this image from GitHub at https://github.com/PacktPublishing/3D-Environment-Design-with-Blender/blob/main/Wood%20Cabin%20Reference.jpeg
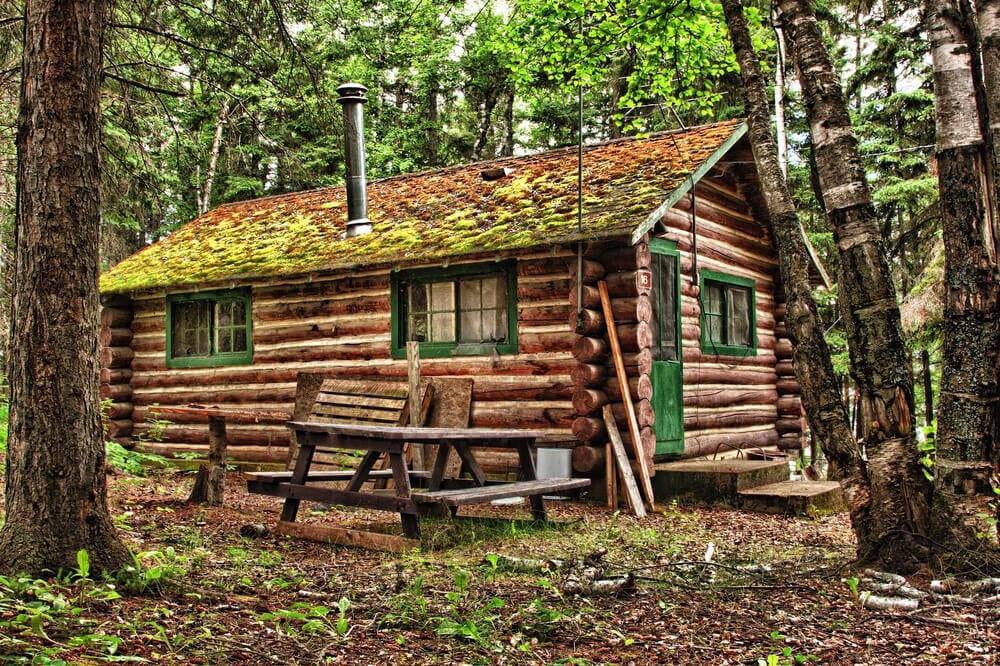
Figure 1.8 – Wood cabin reference
Alright, now let’s start using fSpy.
Downloading fSpy
First, let’s download fSpy. You can google fSpy or use this official website link: https://www.fspy.io.
Once on the webpage, we will do the following:
- Click the green Download button.

Figure 1.9 – fSpy download button
You will be directed to GitHub.
- Under Assets, we will be downloading the
fSpy-1.0.3-ia32-win.zipfile, which is 47.2MB Unzip it, and double click on the fSpy icon. - Inside the program interface, on the top bar, go to File -> Open Image.
- Choose the image reference shown in Figure 1.8.
If done right, this is what you will get:
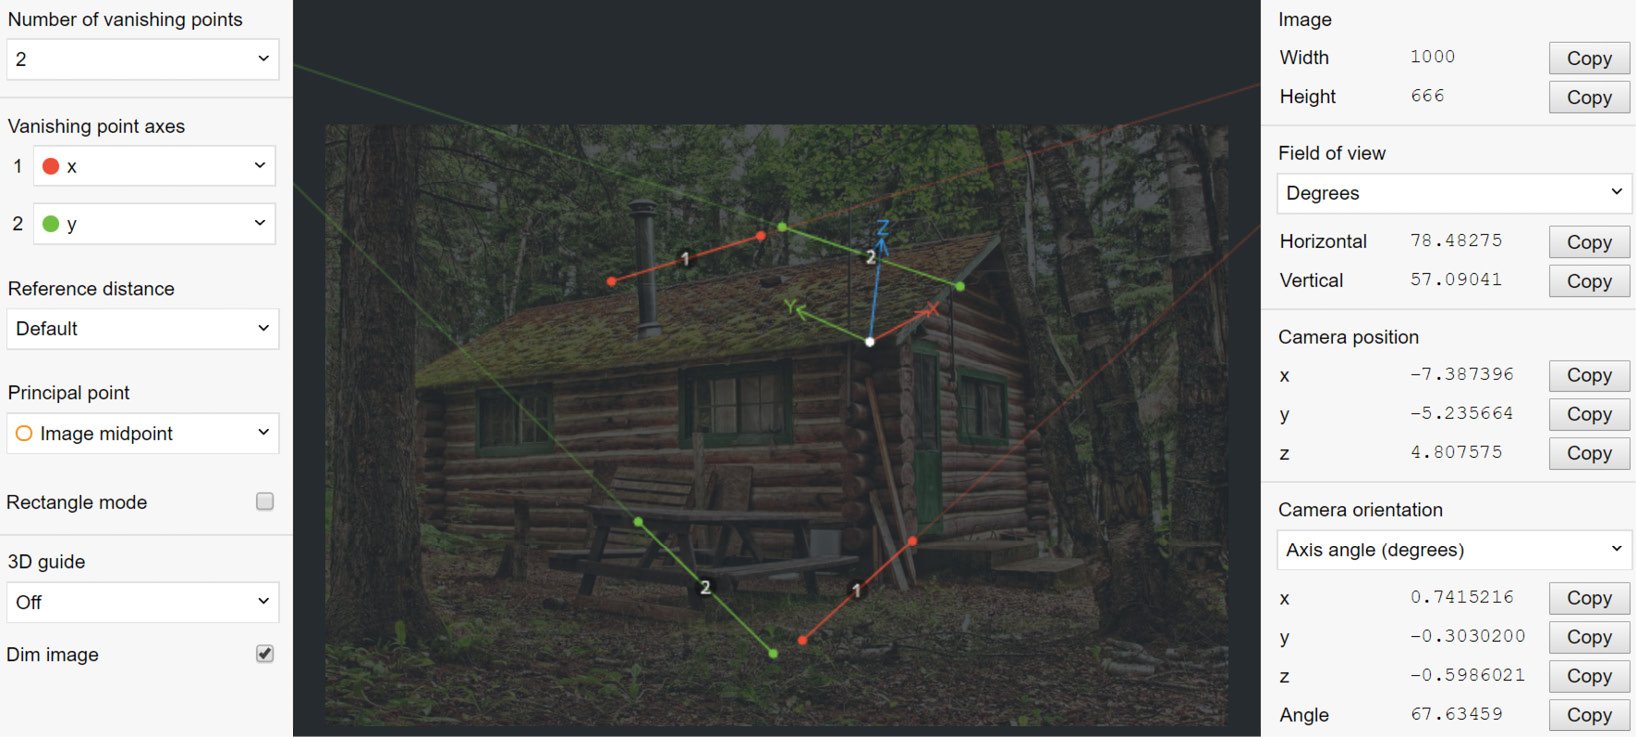
Figure 1.10 – Wood cabin reference loaded into fSpy
After downloading fSpy, put our image reference into it and set the x and z axes to match our reference lines. Now, it’s time to understand the fSpy interface and how we can manipulate it to get the best results.
Breaking down the fSpy tools
Alright, let’s get to work on using the fSPy tools:
- Make sure you’re using two vanishing points; you will find this feature on the top left side panel (see Figure 1.5).
- Make the image reference clear, then on the left side, down below, uncheck the Dim image box.
- On the left panel, switch the y axis to the z axis to get the vertical proportion of your reference.
- Align the x and z axes with the most obvious lines in our reference.
In our case, we can rely on the wood lines and roof. Make sure the lines you choose are far away from each other; this will allow the fSpy to caliber the scene much better.
The final result should be as follows:
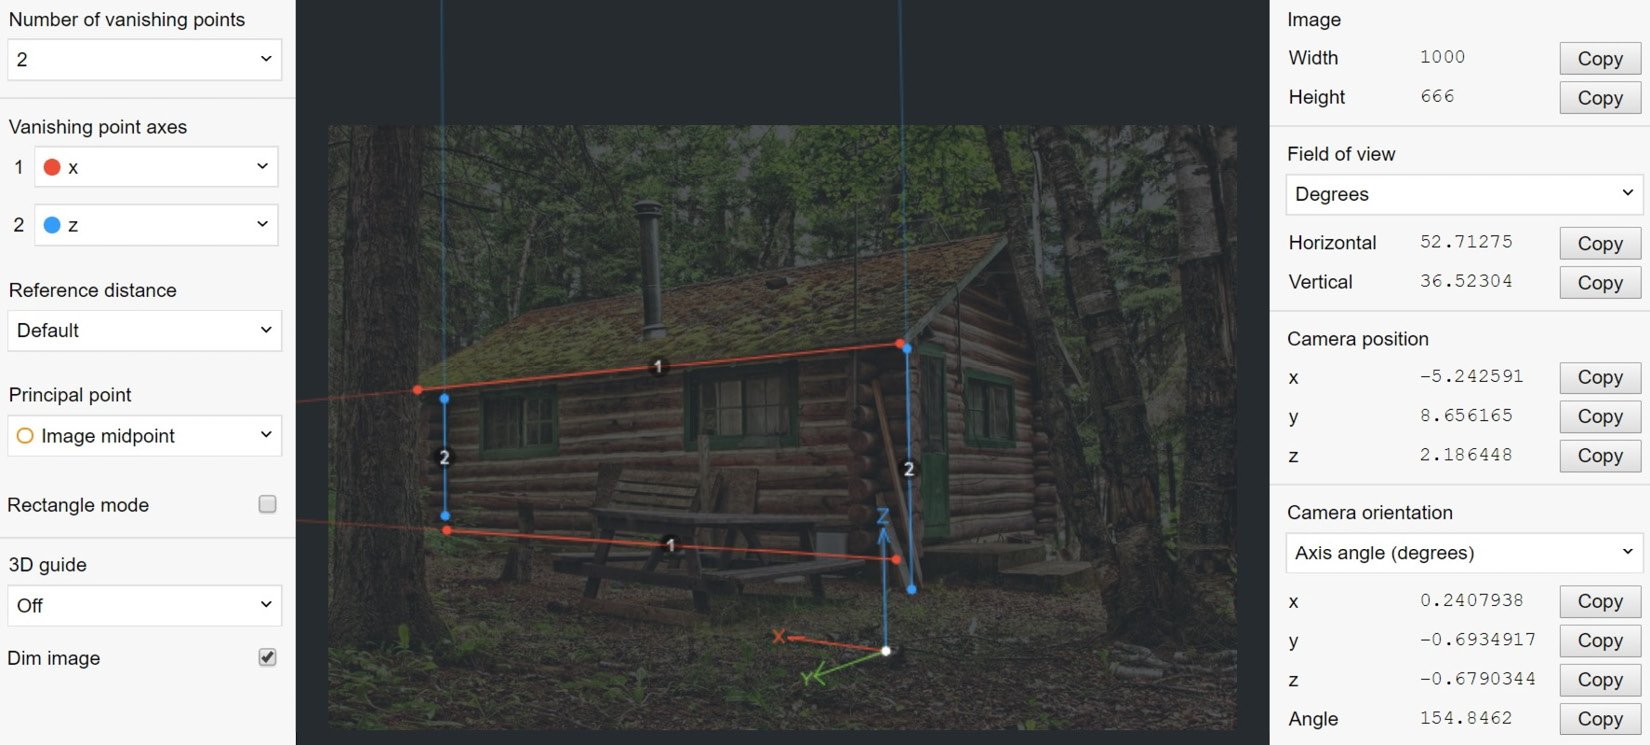
Figure 1.11 – fSpy vanishing point axes aligned with the reference lines
Sometimes the focal length generated by fSpy won’t be accurate, so you have to tweak it a little bit manually – it’s really easy to do so.
Adjusting the focal length
To adjust the focal length, perform the following steps:
- On the left panel, change Principal point to Manual. By default, Principal point will be set to Image midpoint. As soon as you change it to Manual, a yellow point will appear in the middle of your reference.
- If you grab it and move it a little bit, you will change the focal length of your camera. You will see that on the right panel under the Field of view tab, beside the Horizontal value:
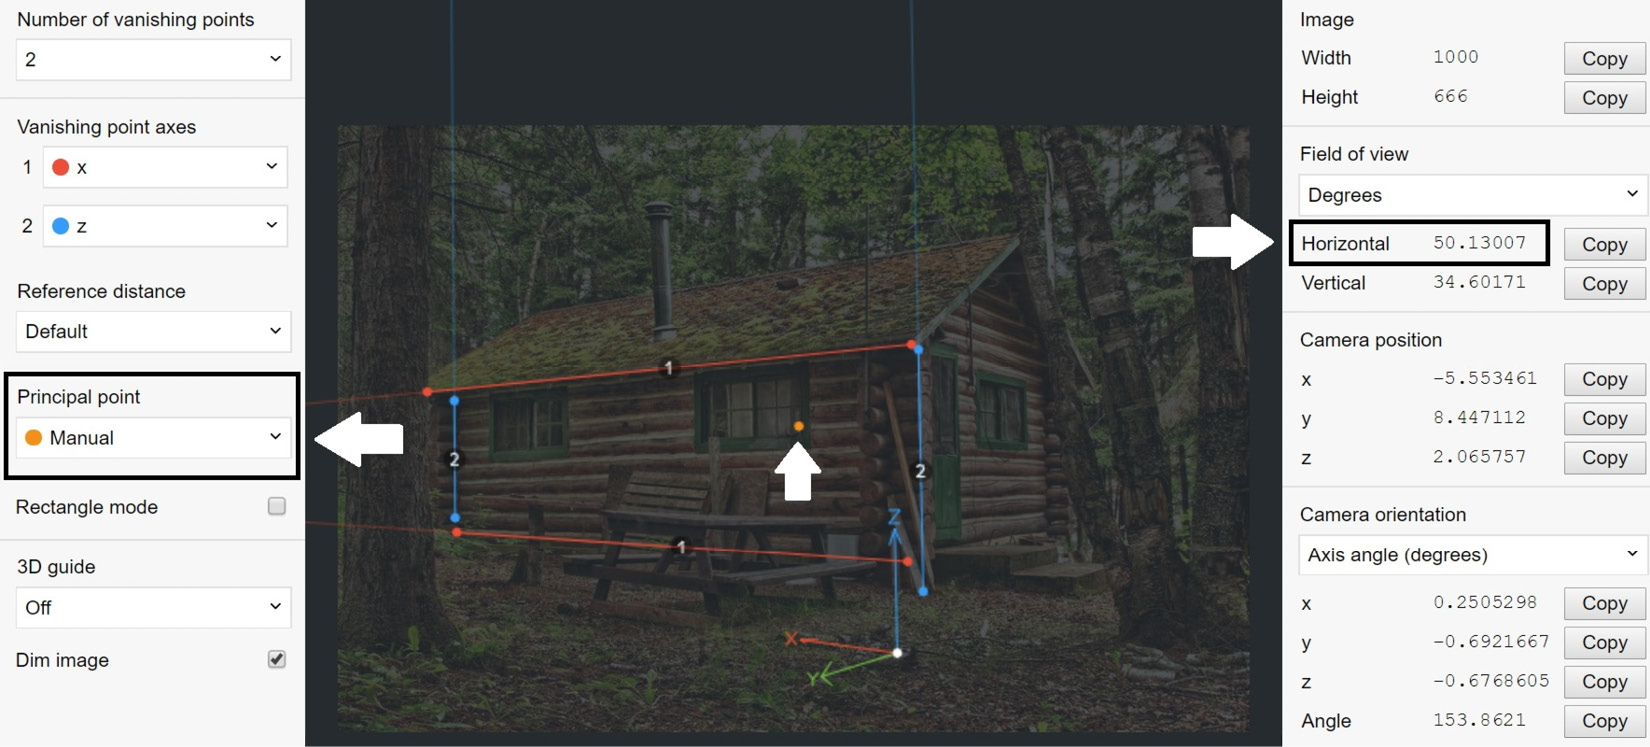
Figure 1.12 – Changing the focal length settings in fSpy
Alright, now let’s save this project: go to File then click on Save As and save the fSpy file to your desktop.
Exporting the fSpy file
Now, let’s export this fSpy file into Blender. To do that, we must install an addon that allows us to do this.
The addon is available at this GitHub link for download: https://github.com/PacktPublishing/3D-Environment-Design-with-Blender/blob/d71de483c88180ac12dc0e6738ce3a7425b00389/chapter-1/fSpy-Blender-Addon.zip.
Once you download the fSpy-Blender-Addon.zip file, make sure to not unzip this file.
Once you get the addon zip file, we can now jump into Blender and install it. So, in our Blender interface, click on Edit -> Preferences, click on Add-ons on the middle left side, then on the top right, click on Install and choose the fSpy-Blender-Addon.zip file. Then you should see a message below saying that the module is installed. Also make sure that you enabled the fSpy addon box Import-Export: Import fSpy project.
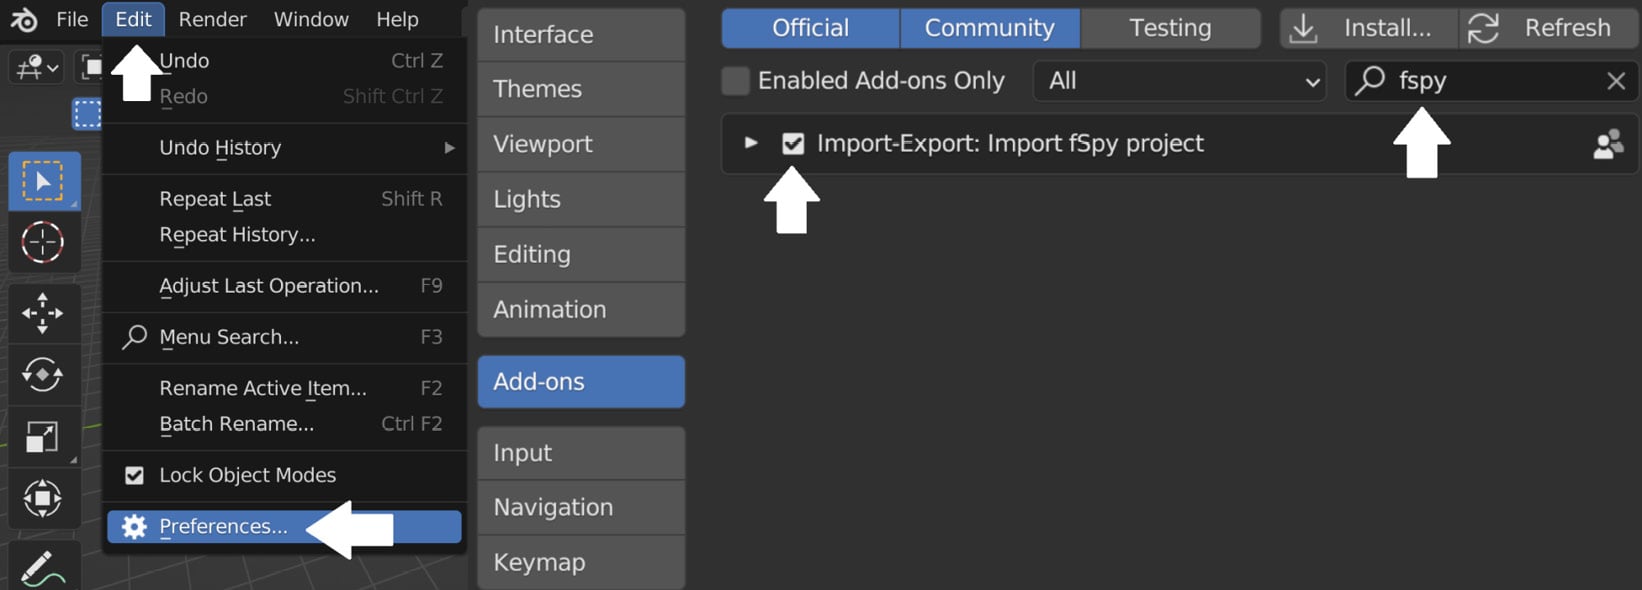
Figure 1.13 – Installing the fSpy add-on in Blender
Alright, now let’s import the fSpy file we created with the fSpy program. If you follow the previous steps, when you go to File and Import, you will see that you have the possibility to import fSpy files into Blender. Just click on Import and choose the fSpy file we created earlier, then you will see the following:
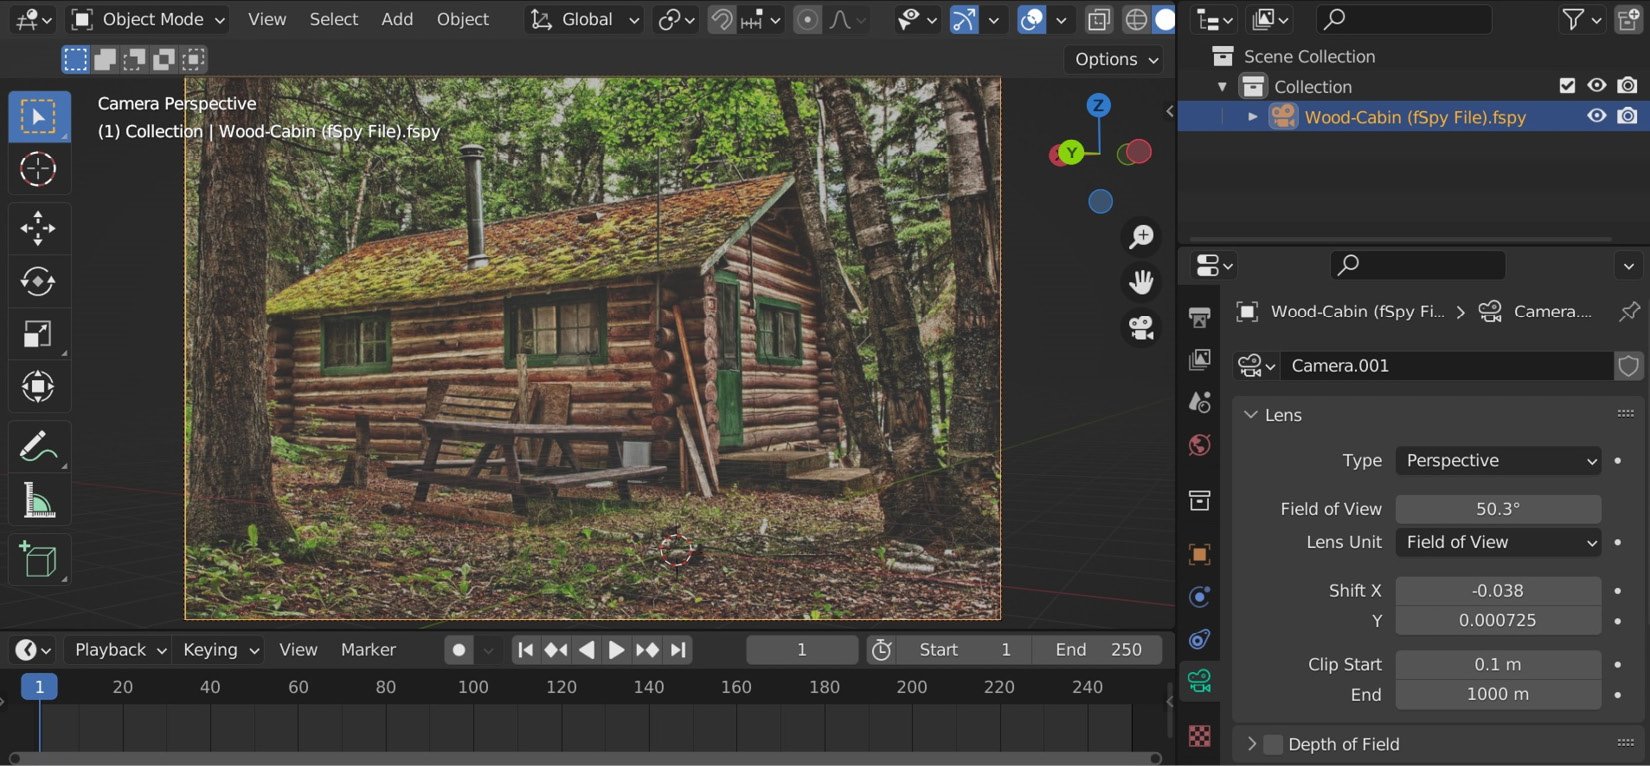
Figure 1.14 – Importing the wood cabin fSpy file into Blender
This is the benefit of using fSpy; now we have camera settings that match those of our photographer who took this shot. The same camera focal length, camera position, and rotation has been replicated. From now on, we can go and start building our scene.
Building our scene
First, let’s exit the camera view; you can do so by pressing the number 0 on the numpad.

Figure 1.15 – First three steps to creating the wood cabin scene
We begin by making a ground plane (1) and adding a simple cube (2), making sure it’s on the top of the grid.
Place the cube on the corner of the cabin reference:
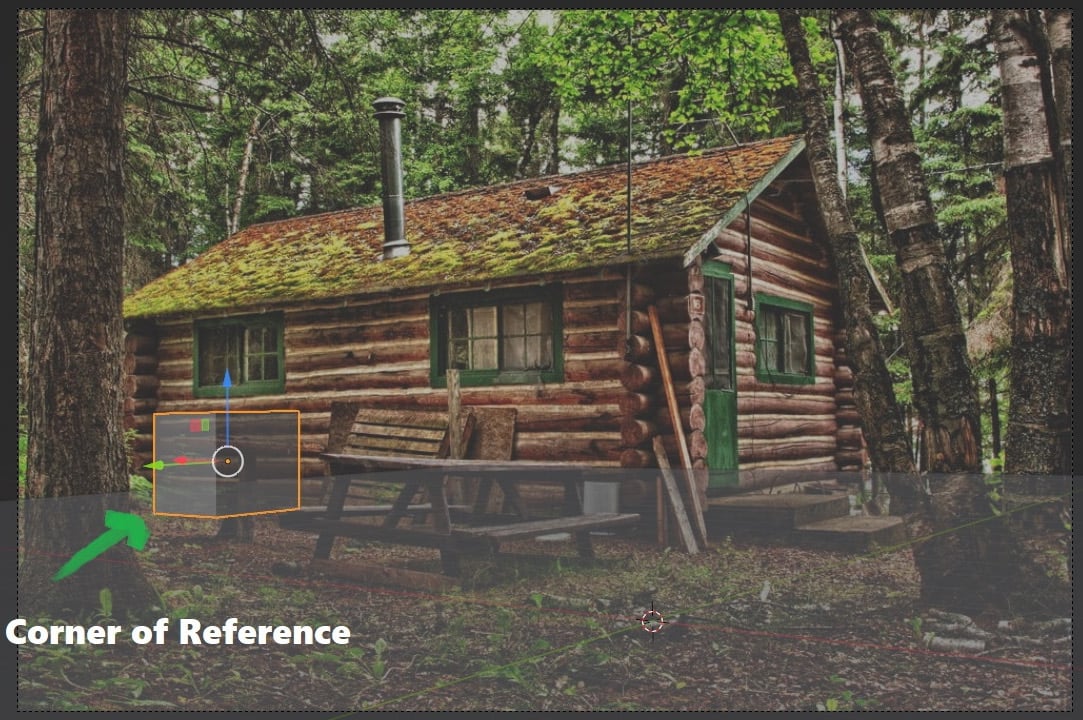
Figure 1.16 – Putting the modeled cube in the corner of the reference
Placing the cube on the corner of the cabin reference will allow you to get the right start. Otherwise, you will be stuck not knowing where to put the initial cube. Another note is to move the cube only along the x and y axes; we need to keep it on the floor.
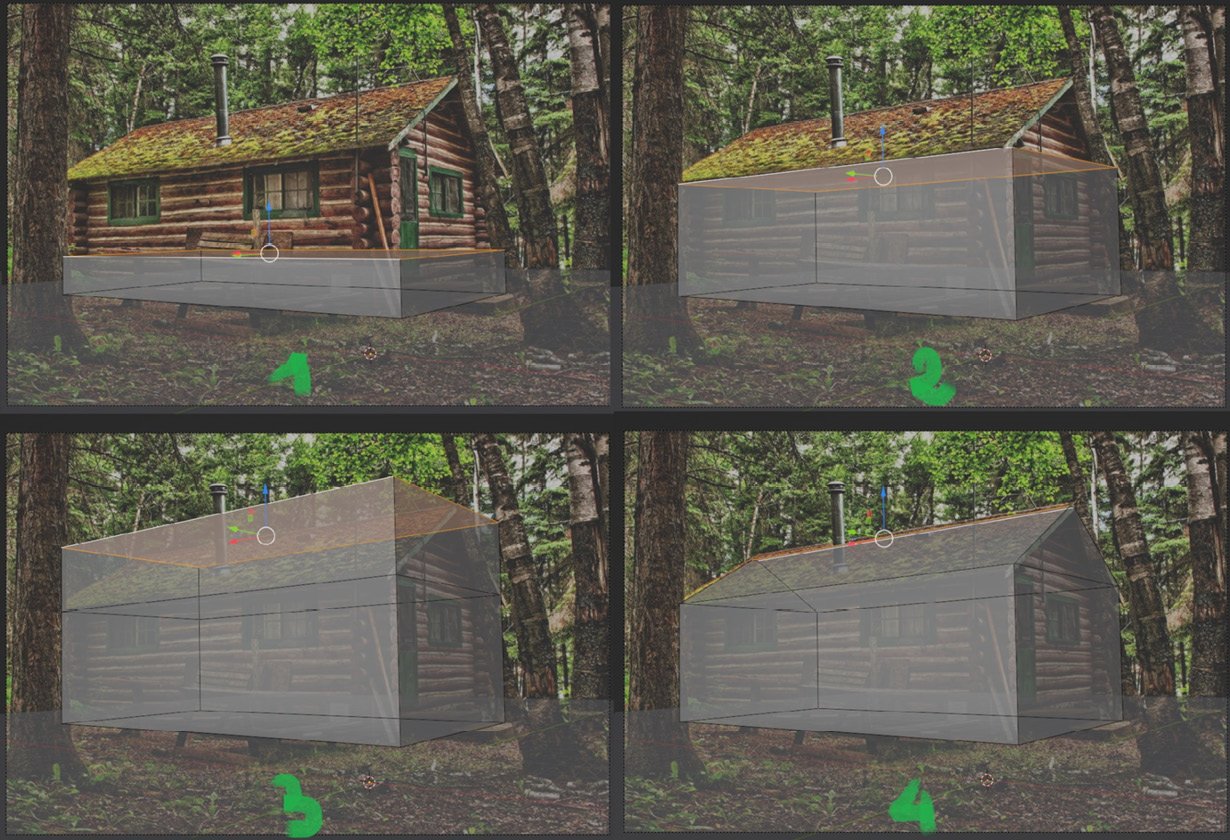
Figure 1.17 – Four steps to model the wood cabin in Blender
Next, we can proceed and create the basic shape of the wood cabin that we have in our reference:
- Select the cube and enter edit mode (press Tab to toggle between edit and object mode).
- In edit mode, select the front face, and move it to cover the length of the cabin wood. Also, align the backface with the back of the wood cabin reference.
- Select the top face and move it upward until it reaches the beginning of the roof.
- Press E to extrude it more upward until it reaches the top of the reference.
- You can scale it on the y axis to make that
Ashape.
As you can see, we will now have a perfect match to our reference image:

Figure 1.18 – The final result of the modeled wood cabin
Also, make sure that you are using the measurements we set earlier; to do so without distorting the camera angle, make sure that you scale everything up one at a time, the camera included.
Now that we have finished matching the same scale of our reference and made a simple wood cabin, you can see the beauty of scale matching; our camera settings in Blender now perfectly match the camera settings used to take the reference image. Both have the same focal length and rotation. This is an excellent start to achieving a photorealistic result.
Next, we will cover one of the most fatal mistakes that prevents most 3D designers from achieving photorealism: forgetting the bevel modifier.


