Installing Unreal Engine
The first step in installing Unreal Engine is to obtain the Epic Games Launcher, which will serve as the starting point for all subsequent operations. To do this, follow these steps:
- Navigate to https://store.epicgames.com/ and download the launcher. If you do not already have an account, you will need to create one. Once the launcher has been downloaded, open it, and enter your credentials to log in.
- To begin, navigate to the Unreal Engine page on the left-hand side. Next, click on the Library tab located at the top of the page.
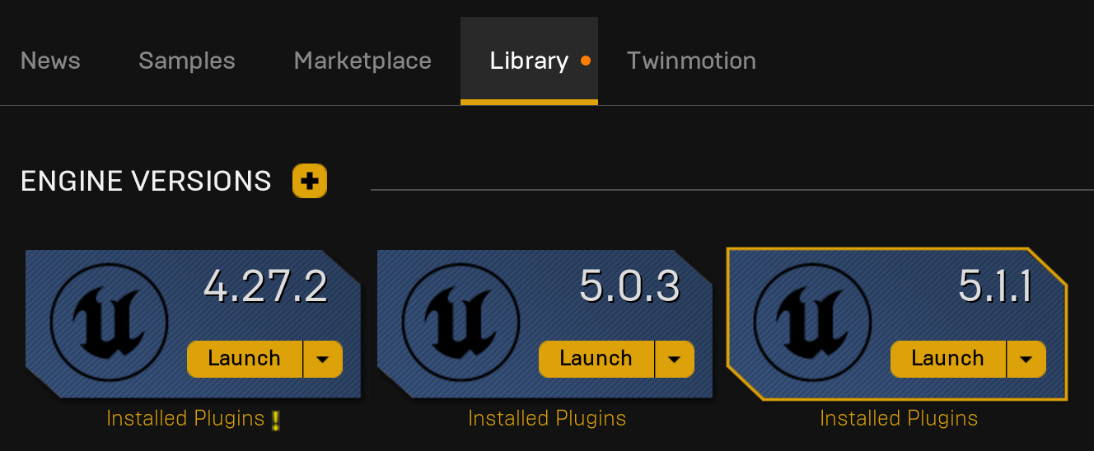
- From here, click on the small + icon to add a new version of Unreal Engine. Select the latest version, such as “Unreal 5.3,” and after specifying the installation path, press Install to begin the installation process. As shown in Figure 1.1, click on the + button to add as many Unreal versions as you need:

Figure 1.1: The launch screen
How to save space on disk
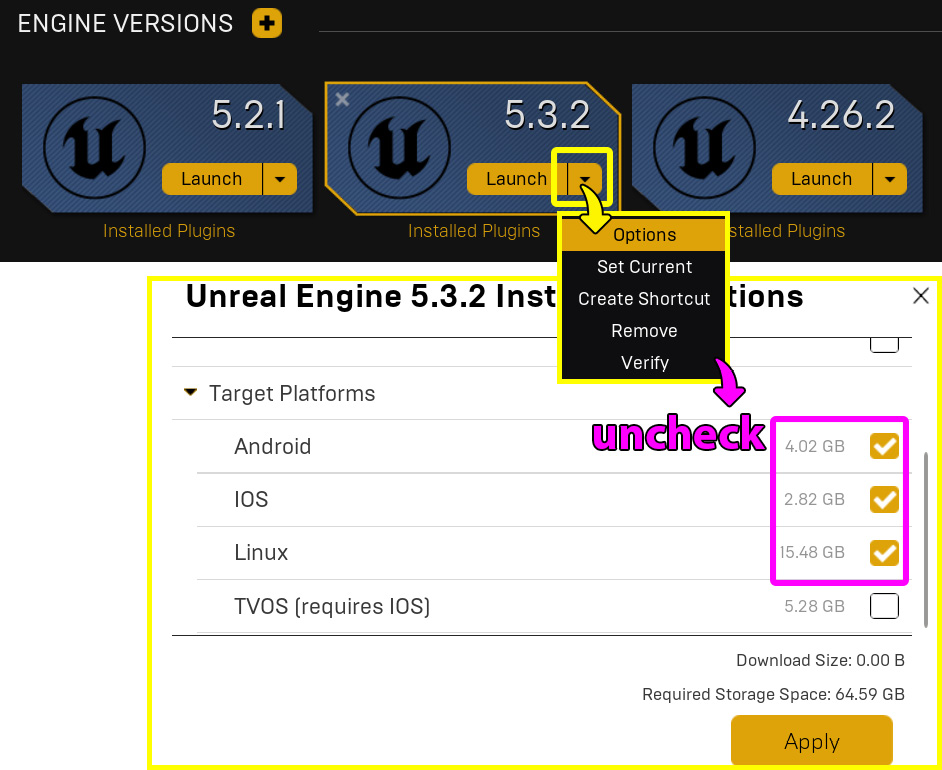
Unreal Engine requires a significant amount of storage space, with projects often the size of several GB. Disk space can be a crucial consideration, so it’s worth taking steps to save space where possible. One simple tip is to choose which components to install with the software. For example, if you’re using a Windows operating system and primarily developing content such as still images and animation for architectural visualization, you likely won’t need the Android, Linux, HoloLens, and iOS components. Removing these components during installation can save you almost 20 GB of space, and doing this for all your Unreal Engine versions can result in substantial storage savings over time. However, keep in mind that if you plan to develop apps for virtual reality headsets such as Meta Quest, or AR applications, you will need to install some of these components. You can add or remove those components at any time, even after installing Unreal – just click on the small tab within the Unreal icons and choose Options, as shown in Figure 1.2. Uncheck the checkboxes for Android, HoloLens, iOS, and Linux before proceeding with the installation, then click Apply.
Don’t worry about these components – you can always add them back later.

Figure 1.2: Removing unnecessary components
Now that we have Unreal Engine installed, it’s time to start having fun with it. However, before that, we have to learn how to create new projects and move around inside them.


