Refining animation with meshes
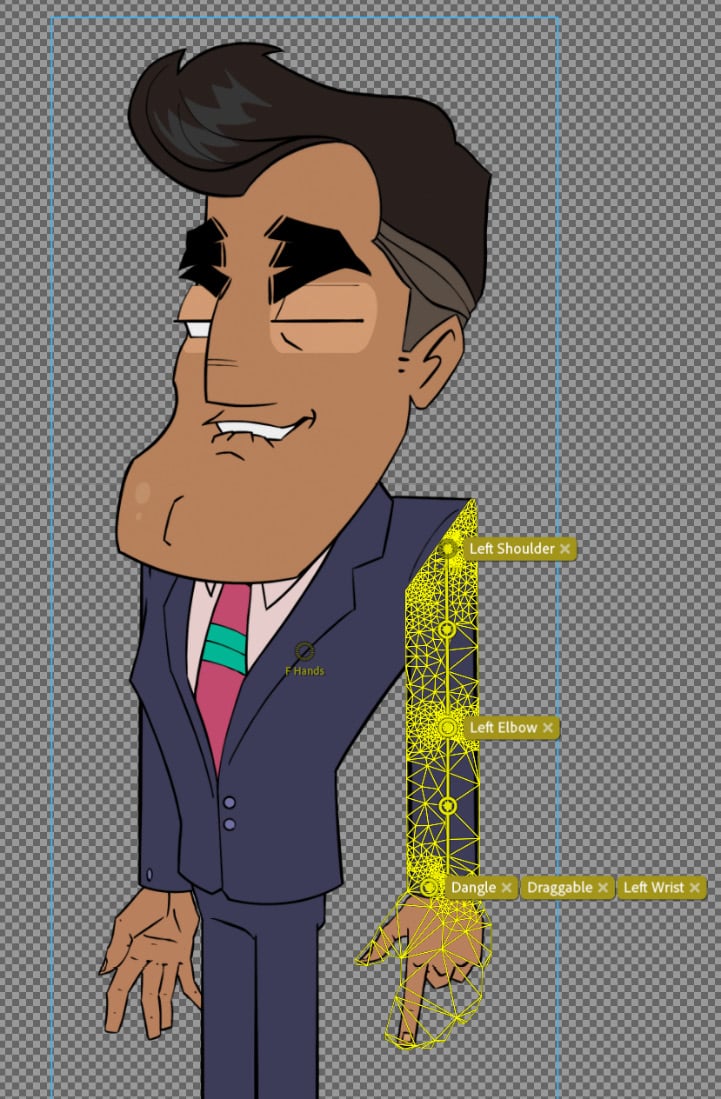
As we continue to add handles to create behaviors, we are actually altering a mesh that was automatically created when we imported the .psd file. While we can’t do much to alter this mesh beyond this, it allows us to see how Character Animator is interpreting the bends and flexibility of the layers. To see this, follow these steps:
- Go to the Rig tab.
- To view the mesh, locate the Mesh buttons under the rig. They are to the right of the Show Rigging Issues button, which is the triangular icon with an exclamation point.

Figure 6.12: The right mesh button will show an outline, while the left will reveal the entire mesh
- Click on the left mesh button (labeled Show Mesh). This will show us every part of the mesh on the rig.
- Now click on the Front Arm layer. You should see the mesh being more defined by the handles, especially since we added sticks in the previous chapter.


