The QAT
If you have been using Microsoft Project with no formal training, you may have never noticed the Quick Access Toolbar (QAT). I always think that the phrase “you don’t know what you don’t know” applies to this toolbar. It is located in the top-left corner of this application. This is named the QAT and is a customizable toolbar used to display your most frequently used tools. By default, this is what you will see on the Quick Access Menu:
- A save button
- An undo button
- A redo button
- A drop-down arrow for more commands.
Here is how it will look to you:

Figure 1.10: The QUAT
Note
Use the drop-down arrow in the QAT to add additional suggested buttons or an option to go to More Commands, which opens a dialog box to allow customizations. This also gives the option to show the toolbar above or below the ribbon. The default is to show it above the ribbon.
We can customize the QAT as per our needs. The following are the steps to customize it:
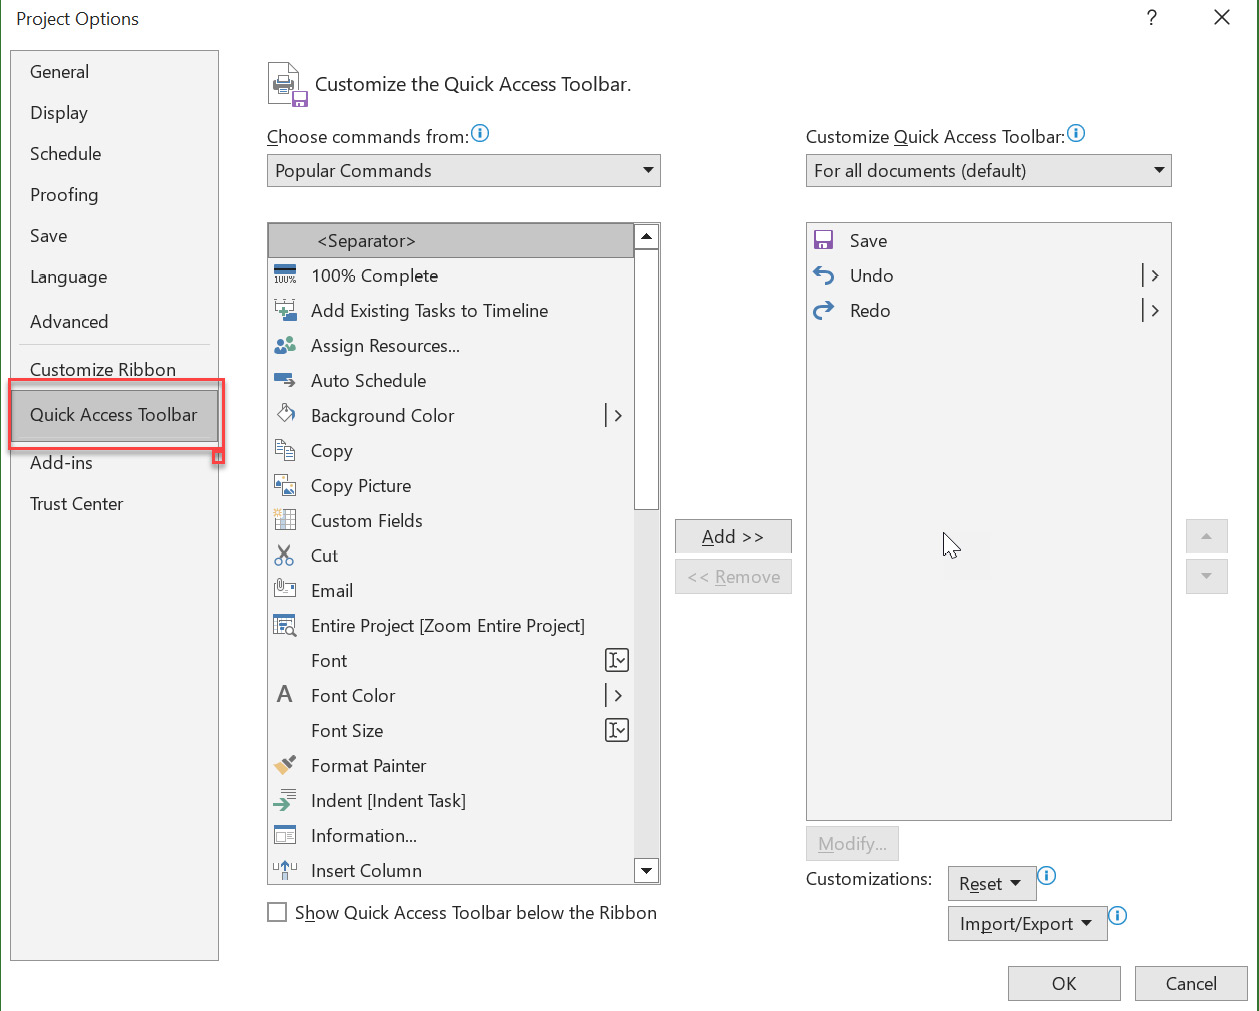
- Click the drop-down arrow at the right of the QAT or click File | Options | Quick Access Toolbar.

Figure 1.11: The Project Options dialog box with Quick Access Toolbar selected
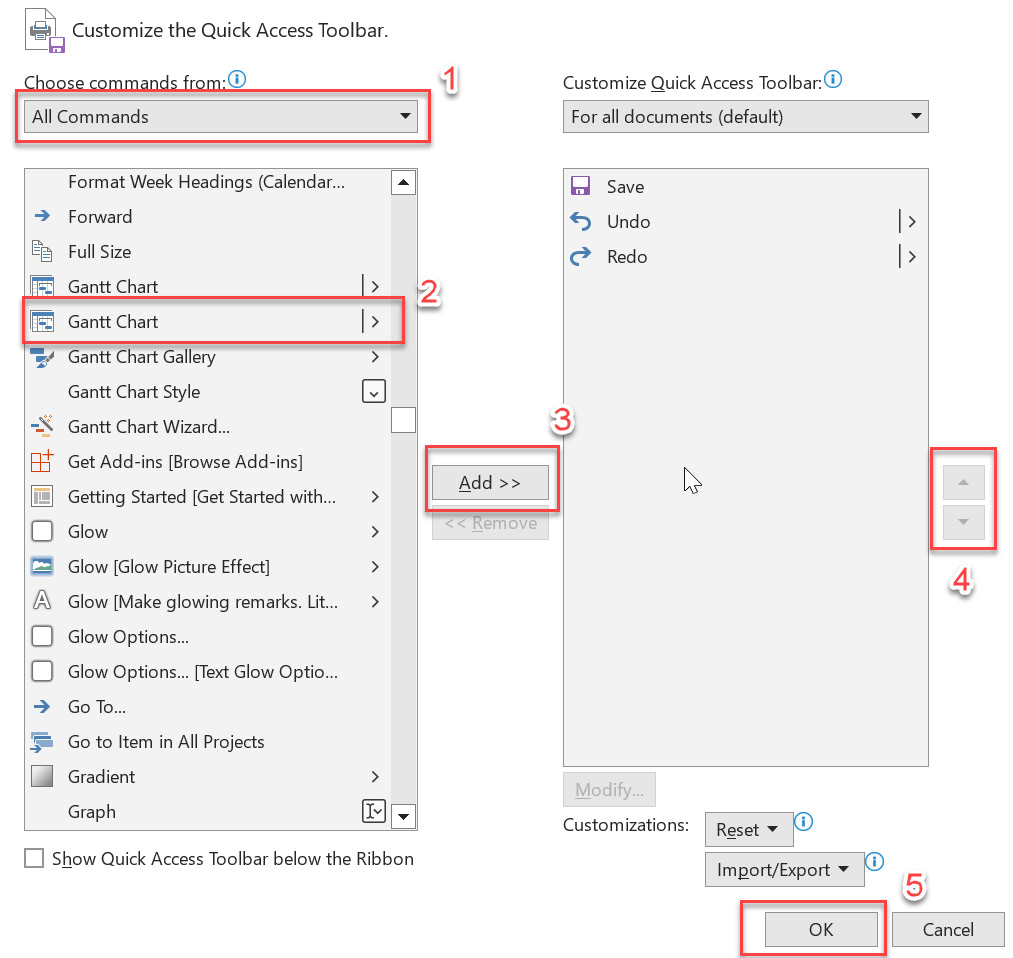
- In the Choose commands from dropdown, select All Commands. You will now have access to all buttons possible for the toolbar.
- Click Add, which will copy the item over to the Customize Quick Access Toolbar field on the right side.

Figure 1.12: Customizing the QAT
- Select the command that you want to add to the QAT. My recommendations are as follows:
- Close All
- Update Tasks
- Entire Project
- Copy Picture
- Scroll to Task
- Gantt Chart

Figure 1.13: A customized QAT
- Select the item and either double-click on it or click the Add button that is in the center between the Choose commands from box and the Customize Quick Access Toolbar box. You can also double-click on the command that you want to send from one box to the other.
- Rearrange the commands in the order you would like them to appear by selecting a command in the Customize Quick Access Toolbar box and using the arrow up or arrow down buttons to move it to the desired location.
- Click OK and the buttons will now be on the toolbar:

Figure 1.14: Customized QAT
The QAT can be a real time-saver for helping you get around quickly and efficiently within Microsoft Project. Time is the one thing we all need more of and, if used correctly, this technique will help free up your time.
To reinforce the concepts taught in this chapter, please refer to Chapter 14, Practice Exercises, for a practice exercise written specific for this chapter. This exercise will help solidify your understanding and provide hands-on experience with the material covered. Appendix C, Discussion Points and Assessment Questions, will enhance your learning experience or those of your students and teams by promoting continuous learning assessment and discussion topics for each chapter.


