Search icon CANCEL
Subscription
0
Cart icon
Your Cart (0 item)
Close icon
You have no products in your basket yet
Arrow left icon
Explore Products
Best Sellers
New Releases
Books
Videos
Audiobooks
Learning Hub
Free Learning
Arrow right icon
Arrow up icon
GO TO TOP
Working Smarter with Microsoft Project

You're reading from   Working Smarter with Microsoft Project Implement effective project control techniques to maximize efficiency and drive successful outcomes

Arrow left icon
Product type Paperback
Published in Nov 2024
Publisher Packt
ISBN-13 9781835883983
Length 312 pages
Edition 1st Edition
Arrow right icon
Author (1):
Arrow left icon
Staci Warne Staci Warne
Author Profile Icon Staci Warne
Staci Warne
Arrow right icon
View More author details
Toc

Table of Contents (20) Chapters Close

Preface 1. Chapter 1: Defining the Project Schedule 2. Chapter 2: Working with Project Calendars FREE CHAPTER 3. Chapter 3: Managing and Defining Tasks 4. Chapter 4: Creating, Defining, and Assigning Resources 5. Chapter 5: Defining a Baseline for Project Progress 6. Chapter 6: Identifying and Managing the Critical Path 7. Chapter 7: Tracking Methods for Decision-Making 8. Chapter 8: Optimizing Projects with Advanced Resources 9. Chapter 9: Handling Overallocations 10. Chapter 10: Managing Costs Effectively 11. Chapter 11: Customizing Reports 12. Chapter 12: Project Manager’s Toolbox 13. Chapter 13: AI, ChatGPT, and Microsoft Project 14. Chapter 14: Practice Exercises 15. Index 16. Other Books You May Enjoy Appendix A: Project Management 1. Appendix B: AI and ChatGPT Project Charter Prompt 2. Appendix C: Discussion Points and Assessment Questions

Custom reports

Creating custom reports in Microsoft Project allows you to tailor the information displayed to meet your specific project needs. The following steps will show you how to create a custom report:

  1. From your project file, select the Report tab | New Report. You will see four options: Blank, Chart, Table, and Comparison. Select the type of report you want to create. Blank will be selected for this example.
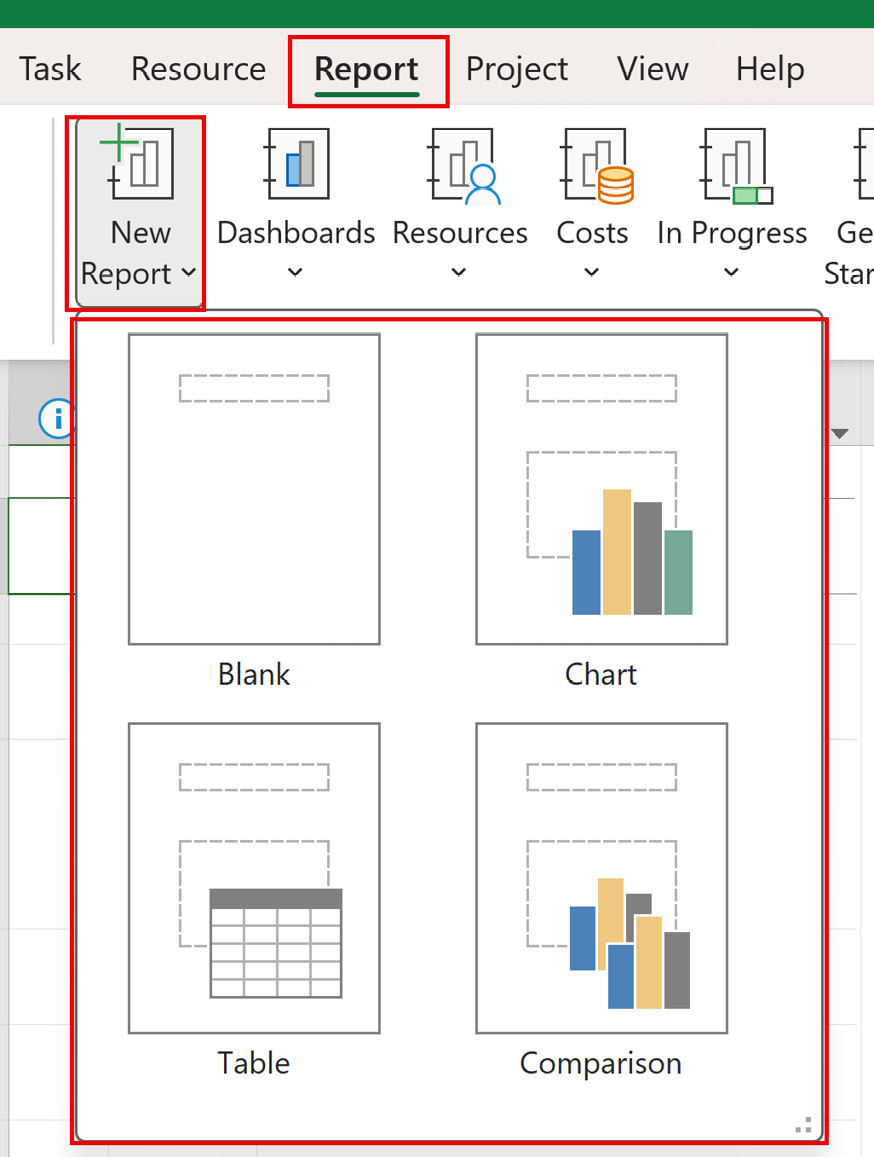
Figure 11.6: New Report options

Figure 11.6: New Report options

  1. In the dialog box that appears, enter a meaningful name for your report and click OK.
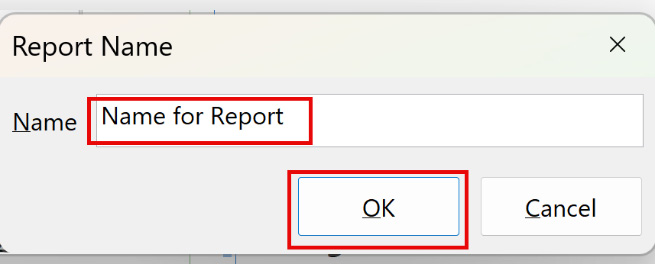
Figure 11.7: New report name

Figure 11.7: New report name

This will take you to the Report Design view. Objects and elements that you prefer to add to this view will be created in this window. Use the Report Design ribbon to customize the new report.
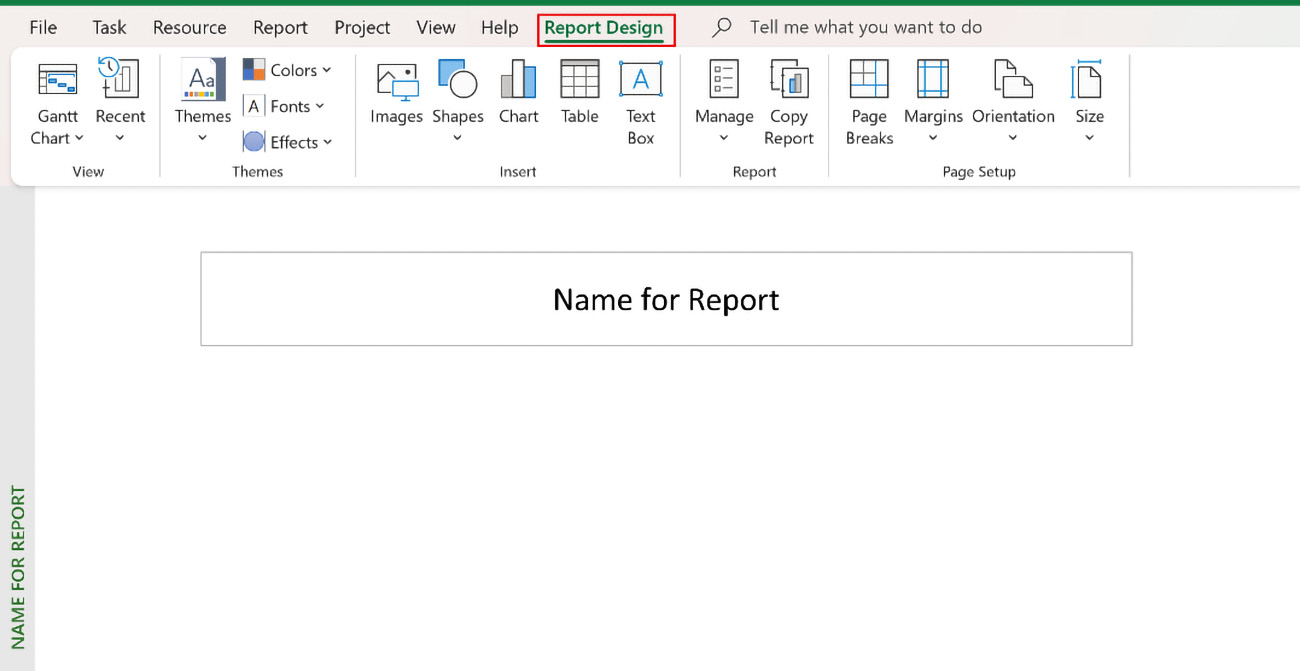
Figure 11.8: New blank custom report

Figure 11.8: New blank custom report

You can now customize this view of the report by inserting text boxes, tables, charts, pictures...

lock icon The rest of the chapter is locked
Register for a free Packt account to unlock a world of extra content!
A free Packt account unlocks extra newsletters, articles, discounted offers, and much more. Start advancing your knowledge today.
Unlock this book and the full library FREE for 7 days
Get unlimited access to 7000+ expert-authored eBooks and videos courses covering every tech area you can think of
Renews at $19.99/month. Cancel anytime
Banner background image