Scheduling options
Users of Microsoft Project are usually very confused about how tasks are scheduled within Microsoft Project. You have probably noticed that when you make changes to a task or even set up tasks the first time, Project automatically enters task information or moves tasks’ scheduled dates to be different than what was originally set up. What you’re seeing could seem unpredictable and confusing.
Before entering any tasks, take a moment to look at the schedule and identify and make changes to the default schedule that is being used.
To view the default schedule inside of Project, follow these steps:
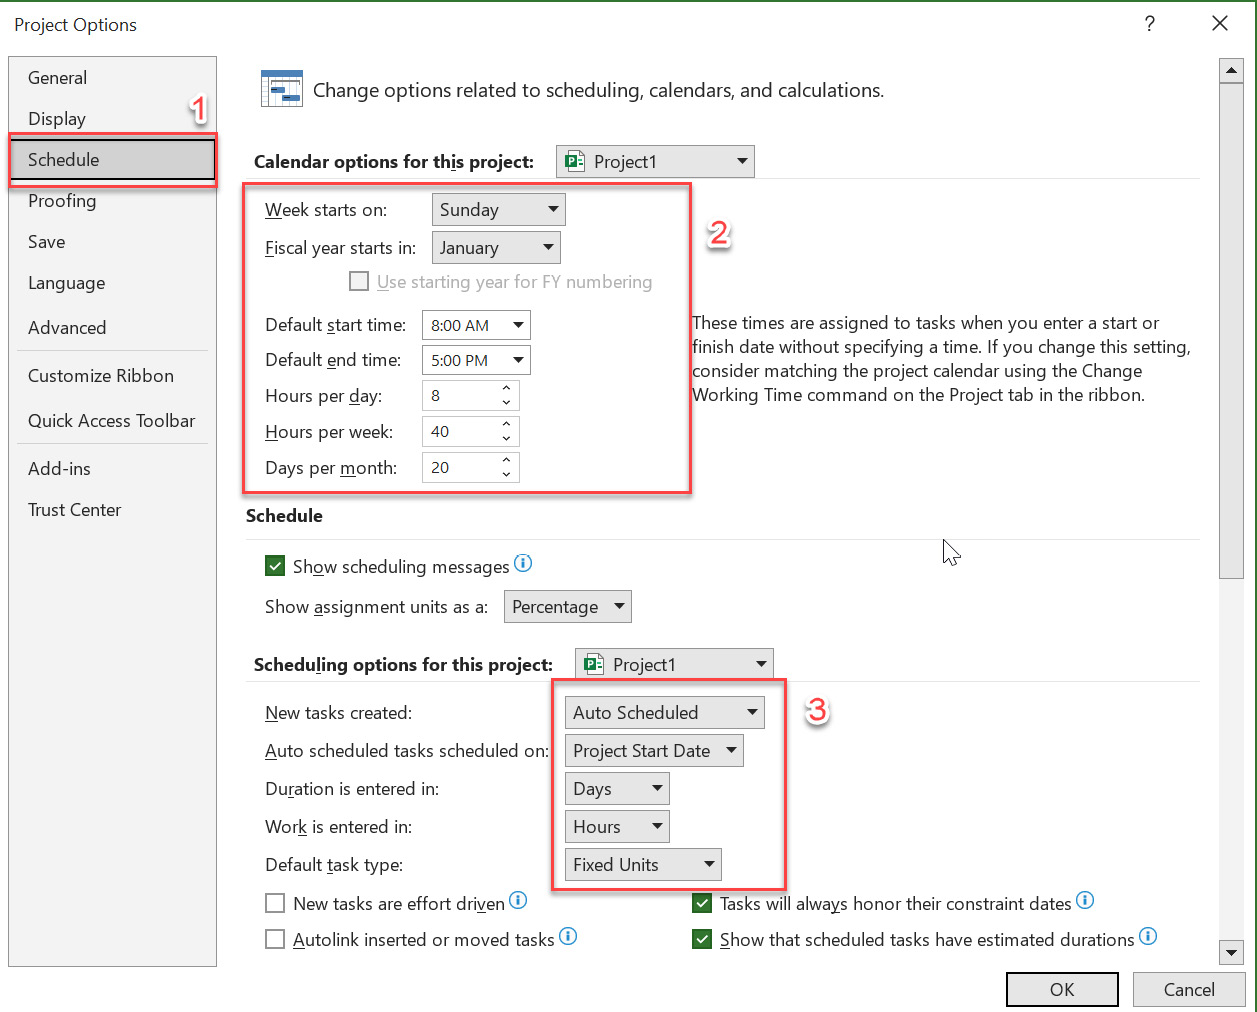
- Select File | Options | Schedule.

Figure 1.5: Project’s scheduling options
- Calendar options for this project shows the defaults before making any changes to the project schedule other than the start date described earlier in this chapter. This is the default schedule used when the scheduling engine is doing calculations, that is, scheduling resources for a task.
- Scheduling options for this project shows all calendar settings that the scheduling engine will follow when the scheduling engine is doing any calculations, that is, following auto-scheduling or manual scheduling, as will be discussed next.
Unless you make changes to this dialog box, Project will follow these settings. Adjusting these is recommended before you even enter any tasks or assign any resources to a task to set up the defaults for your specific project. Keep in mind, however, that some of these settings can be adjusted at the task or resource level as well, which, if done, will take precedence over these defaults shown.
An easy example of this is that if your entire staff works 10-hour days, you can change this in this options dialogue box. If only one person works a 10-hour day, adjust that on their individual calendar for that resource.
Now let’s look at manual and auto-scheduling and how these apply to your project.


