Familiarizing ourselves with the Assets panel
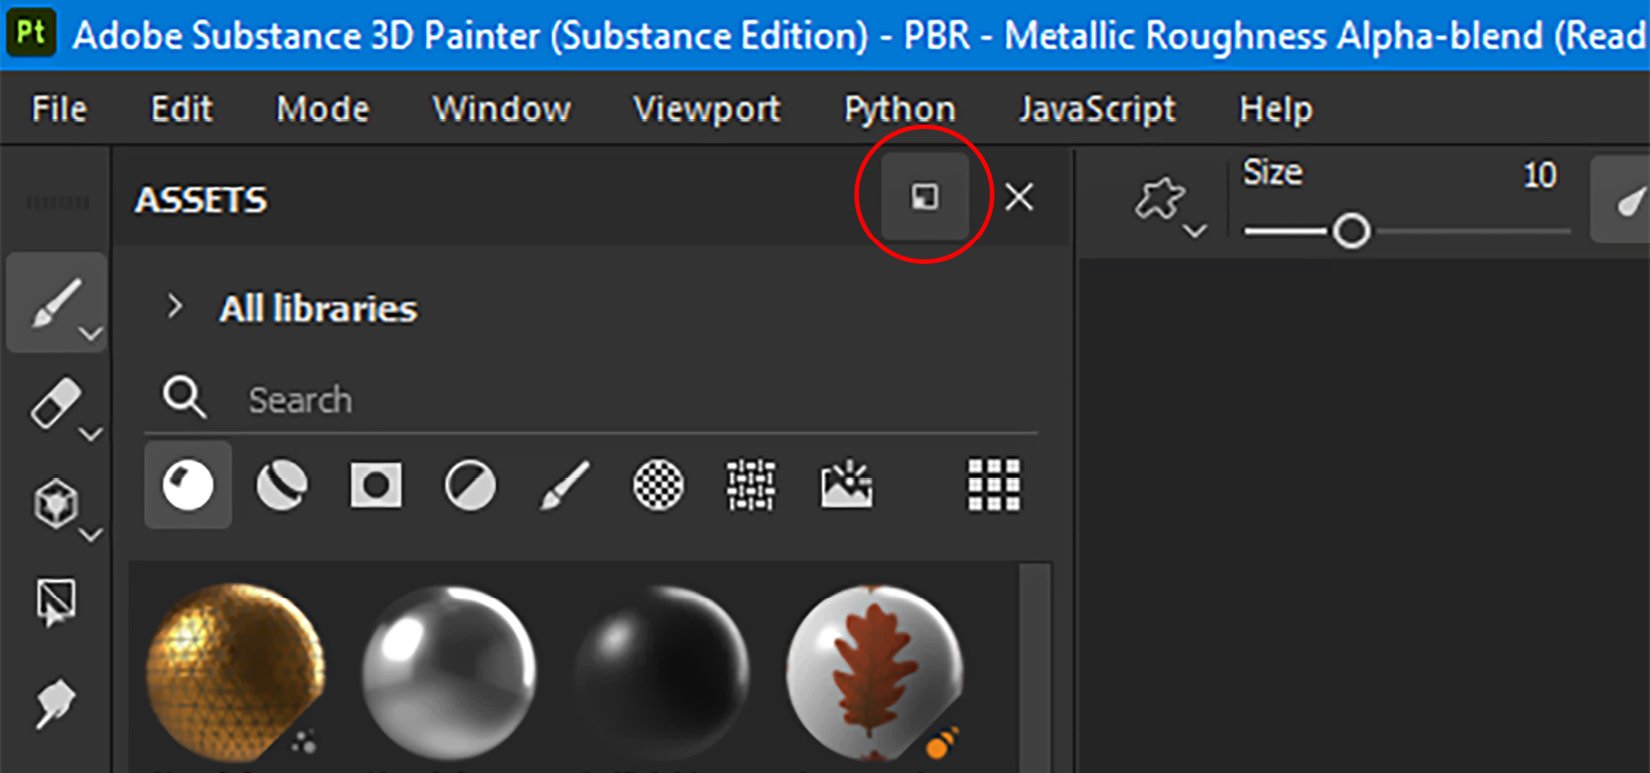
You will find the Assets panel on the left side of the interface. The panel has a dock and undock option on the panel’s top-right side, as shown in Figure 2.1:

Figure 2.1 – Docking and undocking option
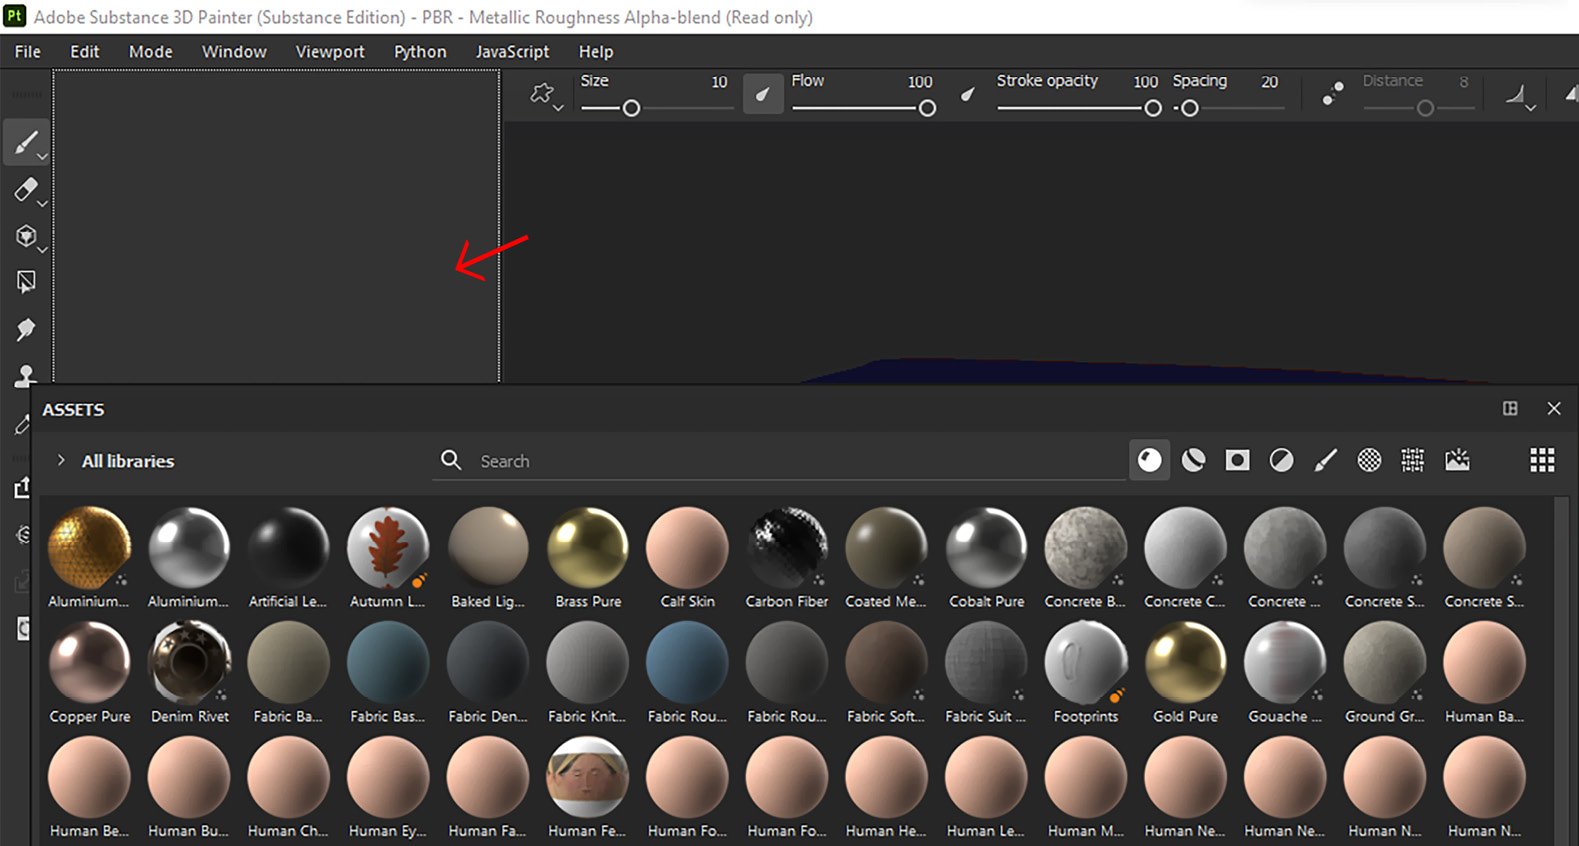
With the help of this option, you can undock the panel, resize it, and place it anywhere you want, as shown in Figure 2.2; you can dock the panel back to its original place by simply moving it to its original position and waiting till it docks back by itself.
In case you change your UI by mistake, you can select Window and then click on Reset UI, which will restore your interface to its default state. Whenever you try to dock back any panel, Adobe Substance 3D Painter makes space for the panel by moving other panels, as shown in Figure 2.2:

Figure 2.2 – Docking back the panel
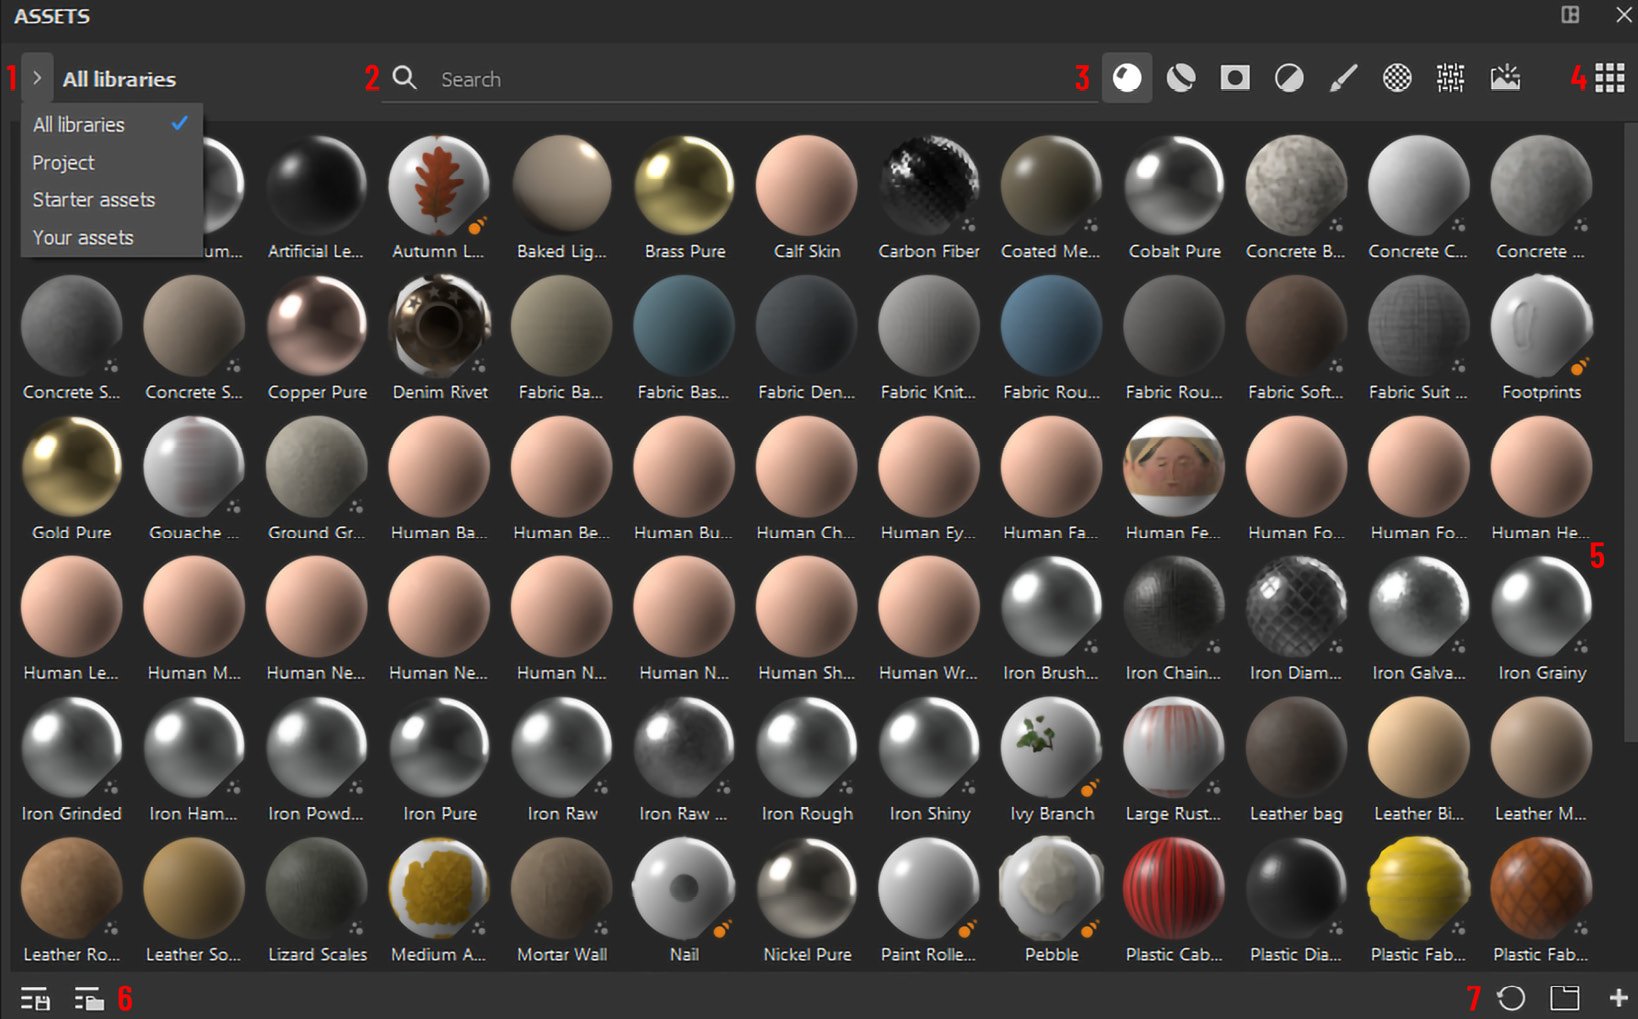
Let us now familiarize ourselves with all the elements in the Assets panel shown in Figure 2.3:

Figure 2.3 – Assets panel
Important elements in the preceding figure have been labeled with numbers, and their descriptions are as follows.
- Breadcrumbs: There are four different ways you can view libraries inside the Assets panel, which you can access through a dropdown:
- All libraries: This will show you all asset libraries.
- Projects: This will show you all assets that belong to your project mesh and the assets that are created after baking maps. However, you need to clear all the search results to view this option.
- Starter assets: This is the assets library that contains assets that are used most commonly in any project. Once you choose Starter assets, you will notice that there is an arrow next to its name, which will further filter the choice of your starter assets.
- Your assets: This is the library that shows the assets you created or imported from other files.
- Search field: The search field allows you to quickly search any material, smart, mask, imported assets, and so on.
- Assets: The icons here represent various assets (from left to right): Materials, Smart Materials, Smart Masks, Filters, Brushes, Alphas, Textures, and Environment maps. These assets are the most frequently used features in Adobe Substance 3D Painter to generate textures.
- Asset thumbnail size: This helps users to customize the way they want to see their assets.
- Assets view: This part of the interface displays all the assets based on the type you have chosen to display.
- (From left to right) Saved searches and Filter by path: The Saved searches option allows you to save your recent searches, while the filter path gives you various filters to customize your search. With these options, you can save time if you are frequently searching for your assets.
- (From left to right) Reset all queries, Open a new sub-library tab, and Import resources: Reset all queries will help you to remove all the saved searches, Open a new sub-library will allow you to open a tab in which you can show assets of your choice, and the Import resources option is a shortcut to import resources outside the Adobe Substance 3D Painter. We will learn about all of them in detail in later sections.
Now that we are familiar with the components of the Assets panel and what each can do, let us learn about importing resources into the panel to work on our project.


